1st: Write your blog post with pictures. Be sure to publish it so that you will have your blog link to go to.
2nd: Open your blog and click on that story that you just wrote. That way the Pin will take the follower directly to that page and not just your home page. (As a Pinterest follower, I get soooo annoyed when I want to learn more from a pin and I have to search all over someone's blog to try to find the needle in the haystack.)
3rd: Go to this website and scroll down to the Pin It Button for Webpage info.
http://pinterest.com/about/goodies/
4th: Add the URL of your blog to that page with your picture directly on it. For example, I wanted my pic of Looking After Louis to be pinned, so I clicked on the Differences to get this URL.
example: http://cruzninfirst.blogspot.com/2012/11/differences.html
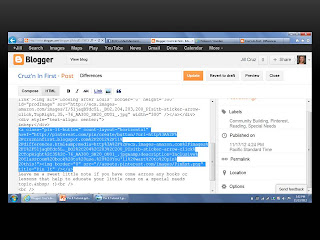
5th: Add the URL of the image. You'll need to open your blog, click to edit your page, and then switch over to the HTML to view the codes.
6th: Highlight this code beginning with http: and ending with .jpg Paste this code in the URL of image to pin. Then you can describe the pin. Doing this step opens the html code for you to paste in your blog under the picture (or wherever you'd like).
8th: This is all there is to it! You added your Pin It button. :) I have not ever added the smaller code on my page and so far it's not been an issue. Good luck and be sure to save and publish your post. :)
~Jill


You are a genius!!! So the whole time I was just copying and pasting the code into the regular part of the post and not the html version. Thanks for the awesome tutorial!!!
ReplyDeleteOh good, glad it helped! Enjoy the rest of your weekend!
DeleteYaaah... I have been looking for an easy Pin It button tutorial.. Thanks so much for sharing this and it was nice and easy and it worked!!!!
ReplyDelete